Recipe: White Chocolate Caramel-Filled Snowflake Candies
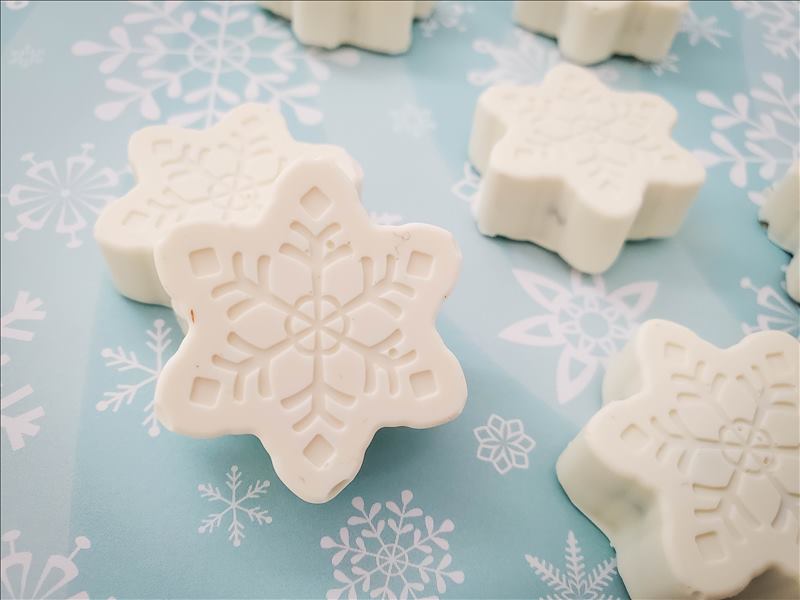
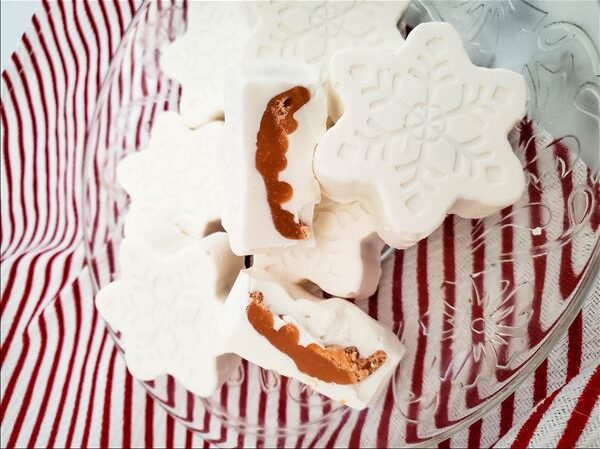
As we find ourselves in the heart of the festive season, there’s a certain magic in crafting homemade delights that not only tantalise the taste buds but also capture the essence of winter. One such enchanting creation is the White Chocolate Caramel-Filled Snowflake Treats. These delightful goodies are not just a feast for the palate but also a visual delight, with their intricate snowflake design. Perfect for gifting or as a sweet indulgence for yourself, these treats blend the creamy richness of white chocolate with the gooey, buttery allure of caramel. Let’s explore how you can create these charming confections at home.
Ingredients You’ll Need:
- ½ cup of white chocolate or white candy melts: This forms the delicate outer shell of your snowflake treats.
- ¼ to ½ cup of caramel bits: Adjust according to how indulgent you want your caramel centre to be.
- Silicone snowflake mould: Essential for shaping your treats into beautiful snowflakes.
- Pastry brush: Necessary for evenly coating the moulds with chocolate.
Step-by-Step Guide to Crafting Your Treats:
- Prepare the White Chocolate Shell: Start by gently melting the white chocolate or candy melts. Follow the instructions on the packaging, whether using a microwave or a double boiler. The goal is a smooth, lump-free consistency.
- Coat the Moulds: Once melted, spoon the chocolate into each cavity of the silicone snowflake mould. Use the pastry brush to spread the chocolate evenly, ensuring every mould detail is covered. This step is crucial for creating a robust shell to hold the caramel filling. Place the mould in the freezer for a few minutes to allow the chocolate to set.
- Prepare the Caramel Filling: Melt the caramel bits according to the package instructions while the chocolate shell sets. The caramel should be smooth and pourable, adding a luxurious touch to your treats.
- Fill the Moulds: Remove the mould from the freezer and carefully spoon the melted caramel into each cavity, filling them to your desired level. Be cautious not to overfill; you’ll need to seal the treats with more chocolate.
- Seal with White Chocolate: Top each treat with another layer of melted white chocolate, encasing the caramel filling. Ensure the top layer is smooth and even for a professional finish.
- Final Set: Return the mould to the freezer for a final set. This step ensures the treats are firm and can be easily removed from the mould without breaking.
Serving and Storing Your Snowflake Treats:
Once set, gently remove the treats from the mould. You’ll have stunning snowflake-shaped delights that are sure to impress. These treats make perfect homemade gifts, beautifully packaged in a festive box or tin. They can also grace a holiday dessert table, adding a touch of elegance and sweetness.
Store your treats in a cool, dry place. If your home is particularly warm, consider keeping them in the fridge to prevent melting. They should remain fresh and delicious for up to two weeks, though they’re likely to be enjoyed much sooner!
A Festive Treat for All Occasions:
These White Chocolate Caramel-Filled Snowflake Treats are not only perfect for the festive season but can be enjoyed anytime you wish to add a touch of winter magic to your day. Whether you’re a seasoned confectioner or a beginner, this recipe is straightforward and rewarding, resulting in treats that are as delightful to make as they are to eat.
So, gather your ingredients, embrace the festive spirit, and start crafting your own batch of snowflake treats. They’re sure to become a cherished tradition in your home, spreading joy and sweetness with every bite. Happy treat-making!
